
Antelope Canyon (Illustrator)
September 18, 2025
Yuki x 3 (Figma, Illustrator, Blender)
September 28, 2025
on
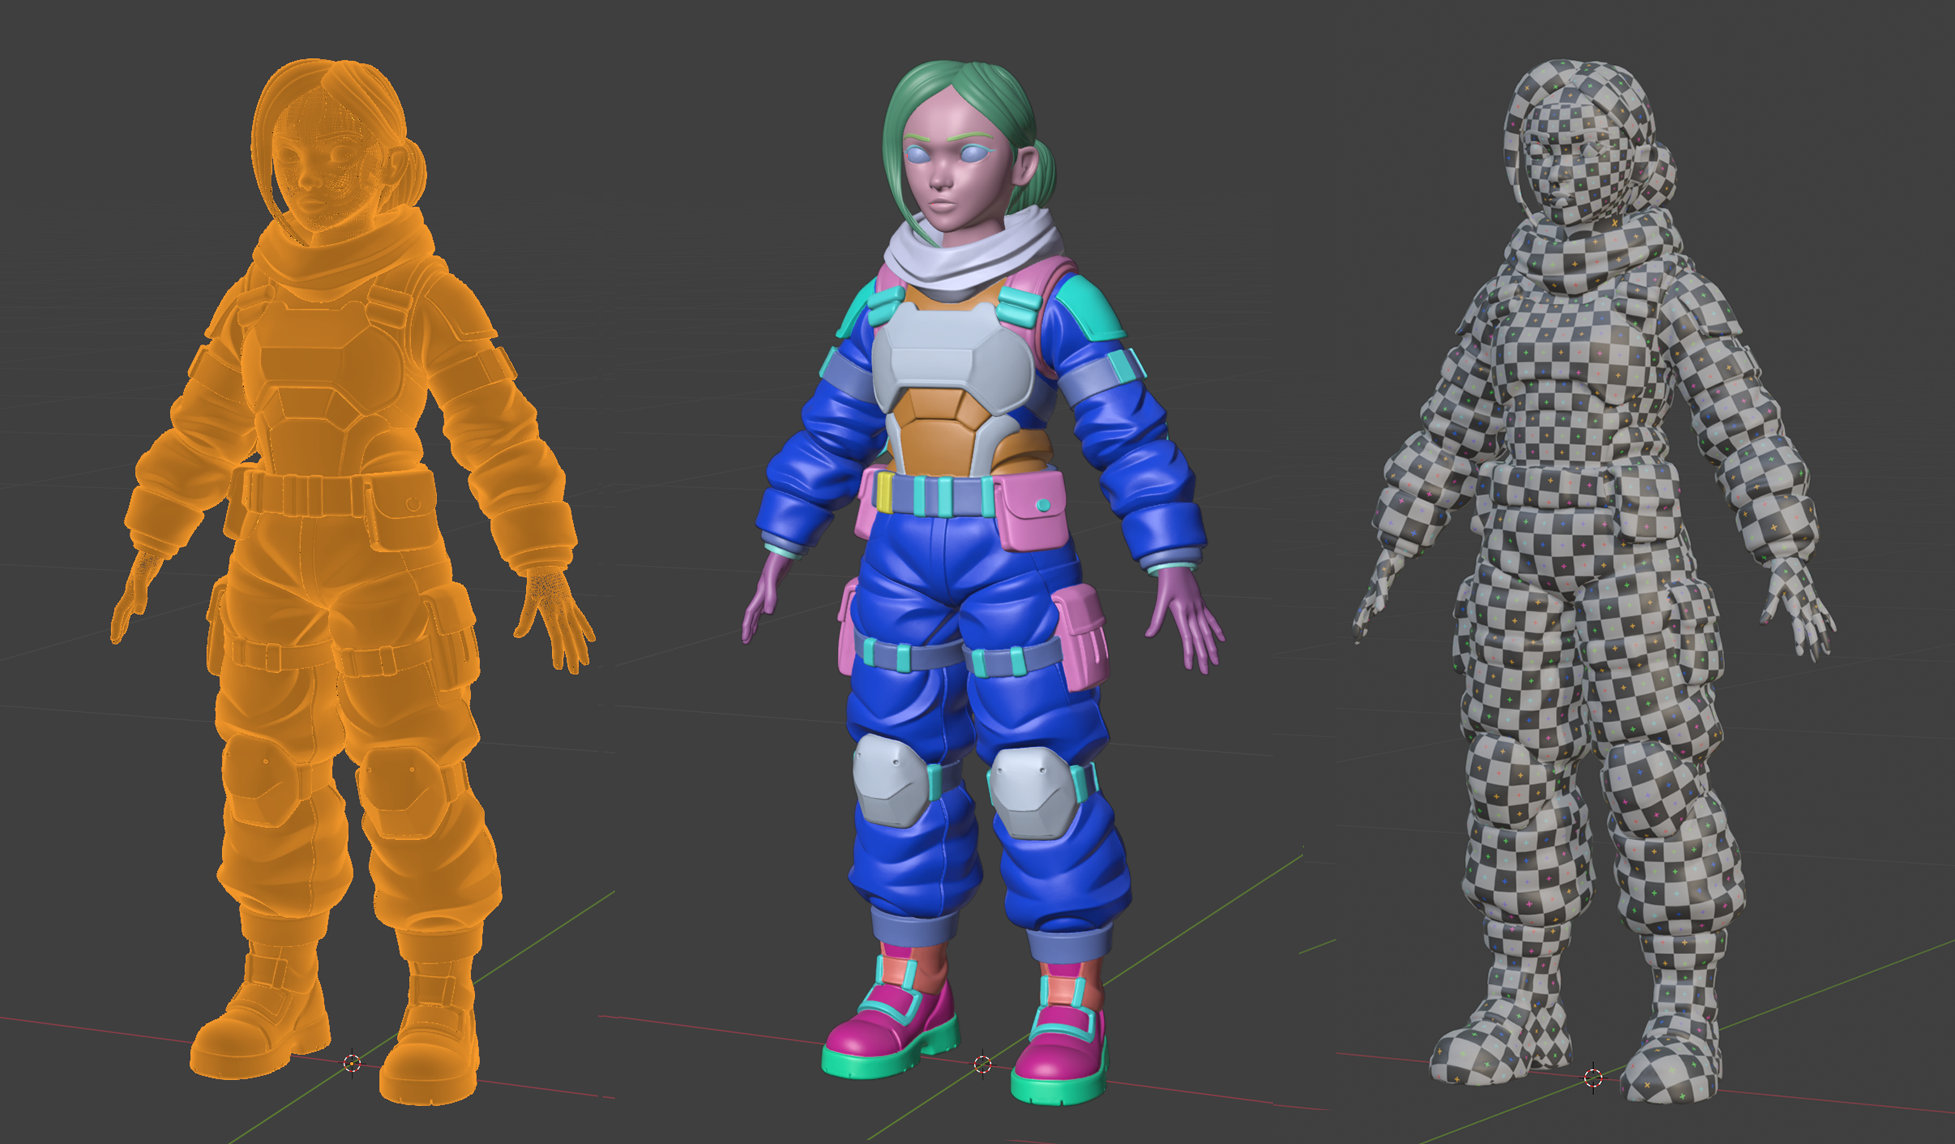
Left to right: high-poly mesh; surfaces with face sets designated for assigning materials; low-poly model with a UV grid texture applied to refine mapping.
Back in February when I was just starting this blog, I wrote a post about a Blender 3D character design I started in parallel with a Udemy course I was taking. I intended to finish it, but got distracted with other projects – and suddenly seven months came and went. But recently, I found another Udemy course that takes a game character design approach to sculpting, texturing, rigging and animating low-poly characters referencing textures from high-poly meshes to produce lightweight characters that preserve the details. It seemed like a perfect complement to the previous course, because it was easy for me to imagine how I could combine the new stuff I learn with the character design I had previously started.
I just wrapped up the course, and wow did I learn a lot, including the basics of working with Substance Painter, something I’ve been putting off for months. My biggest takeaway though was internalizing how to incorporate a broad new (to me) set of features and tools into a practical workflow, and I’m eager to start applying these lessons to a growing list of projects on my plate.
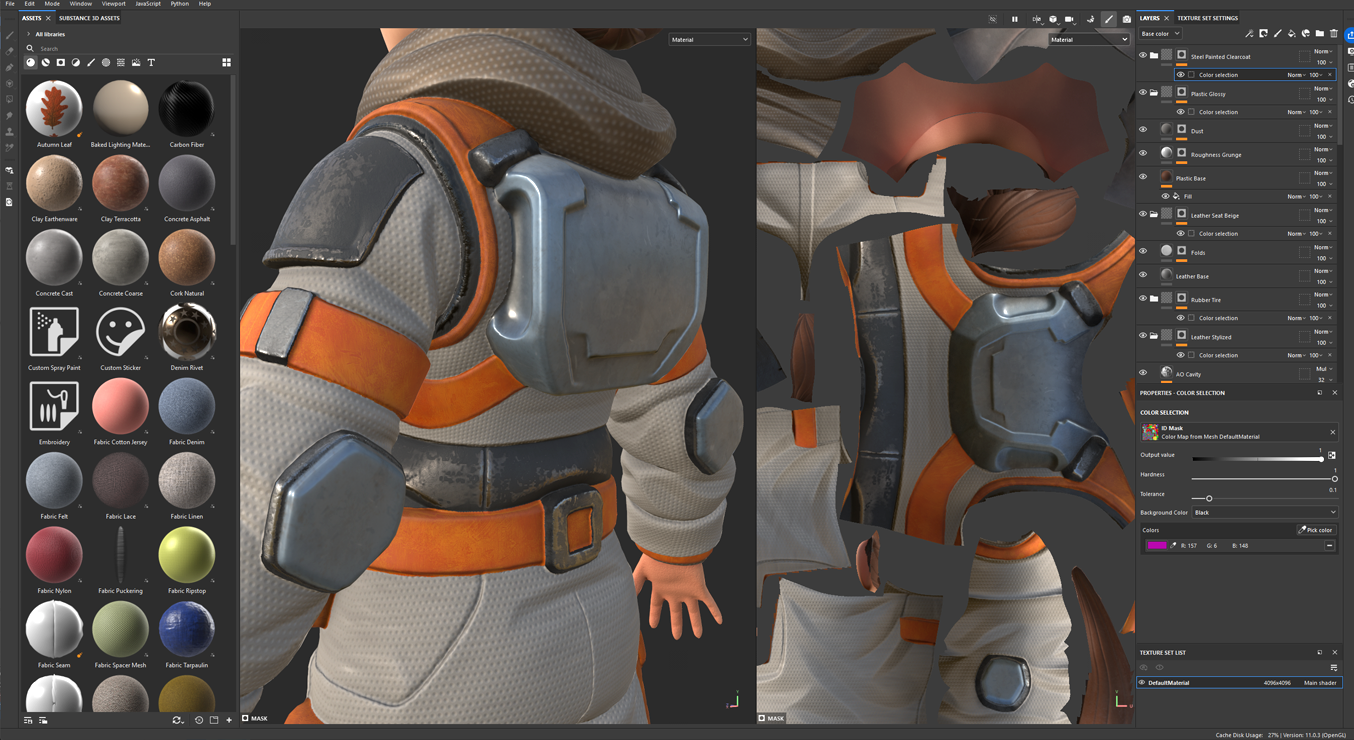
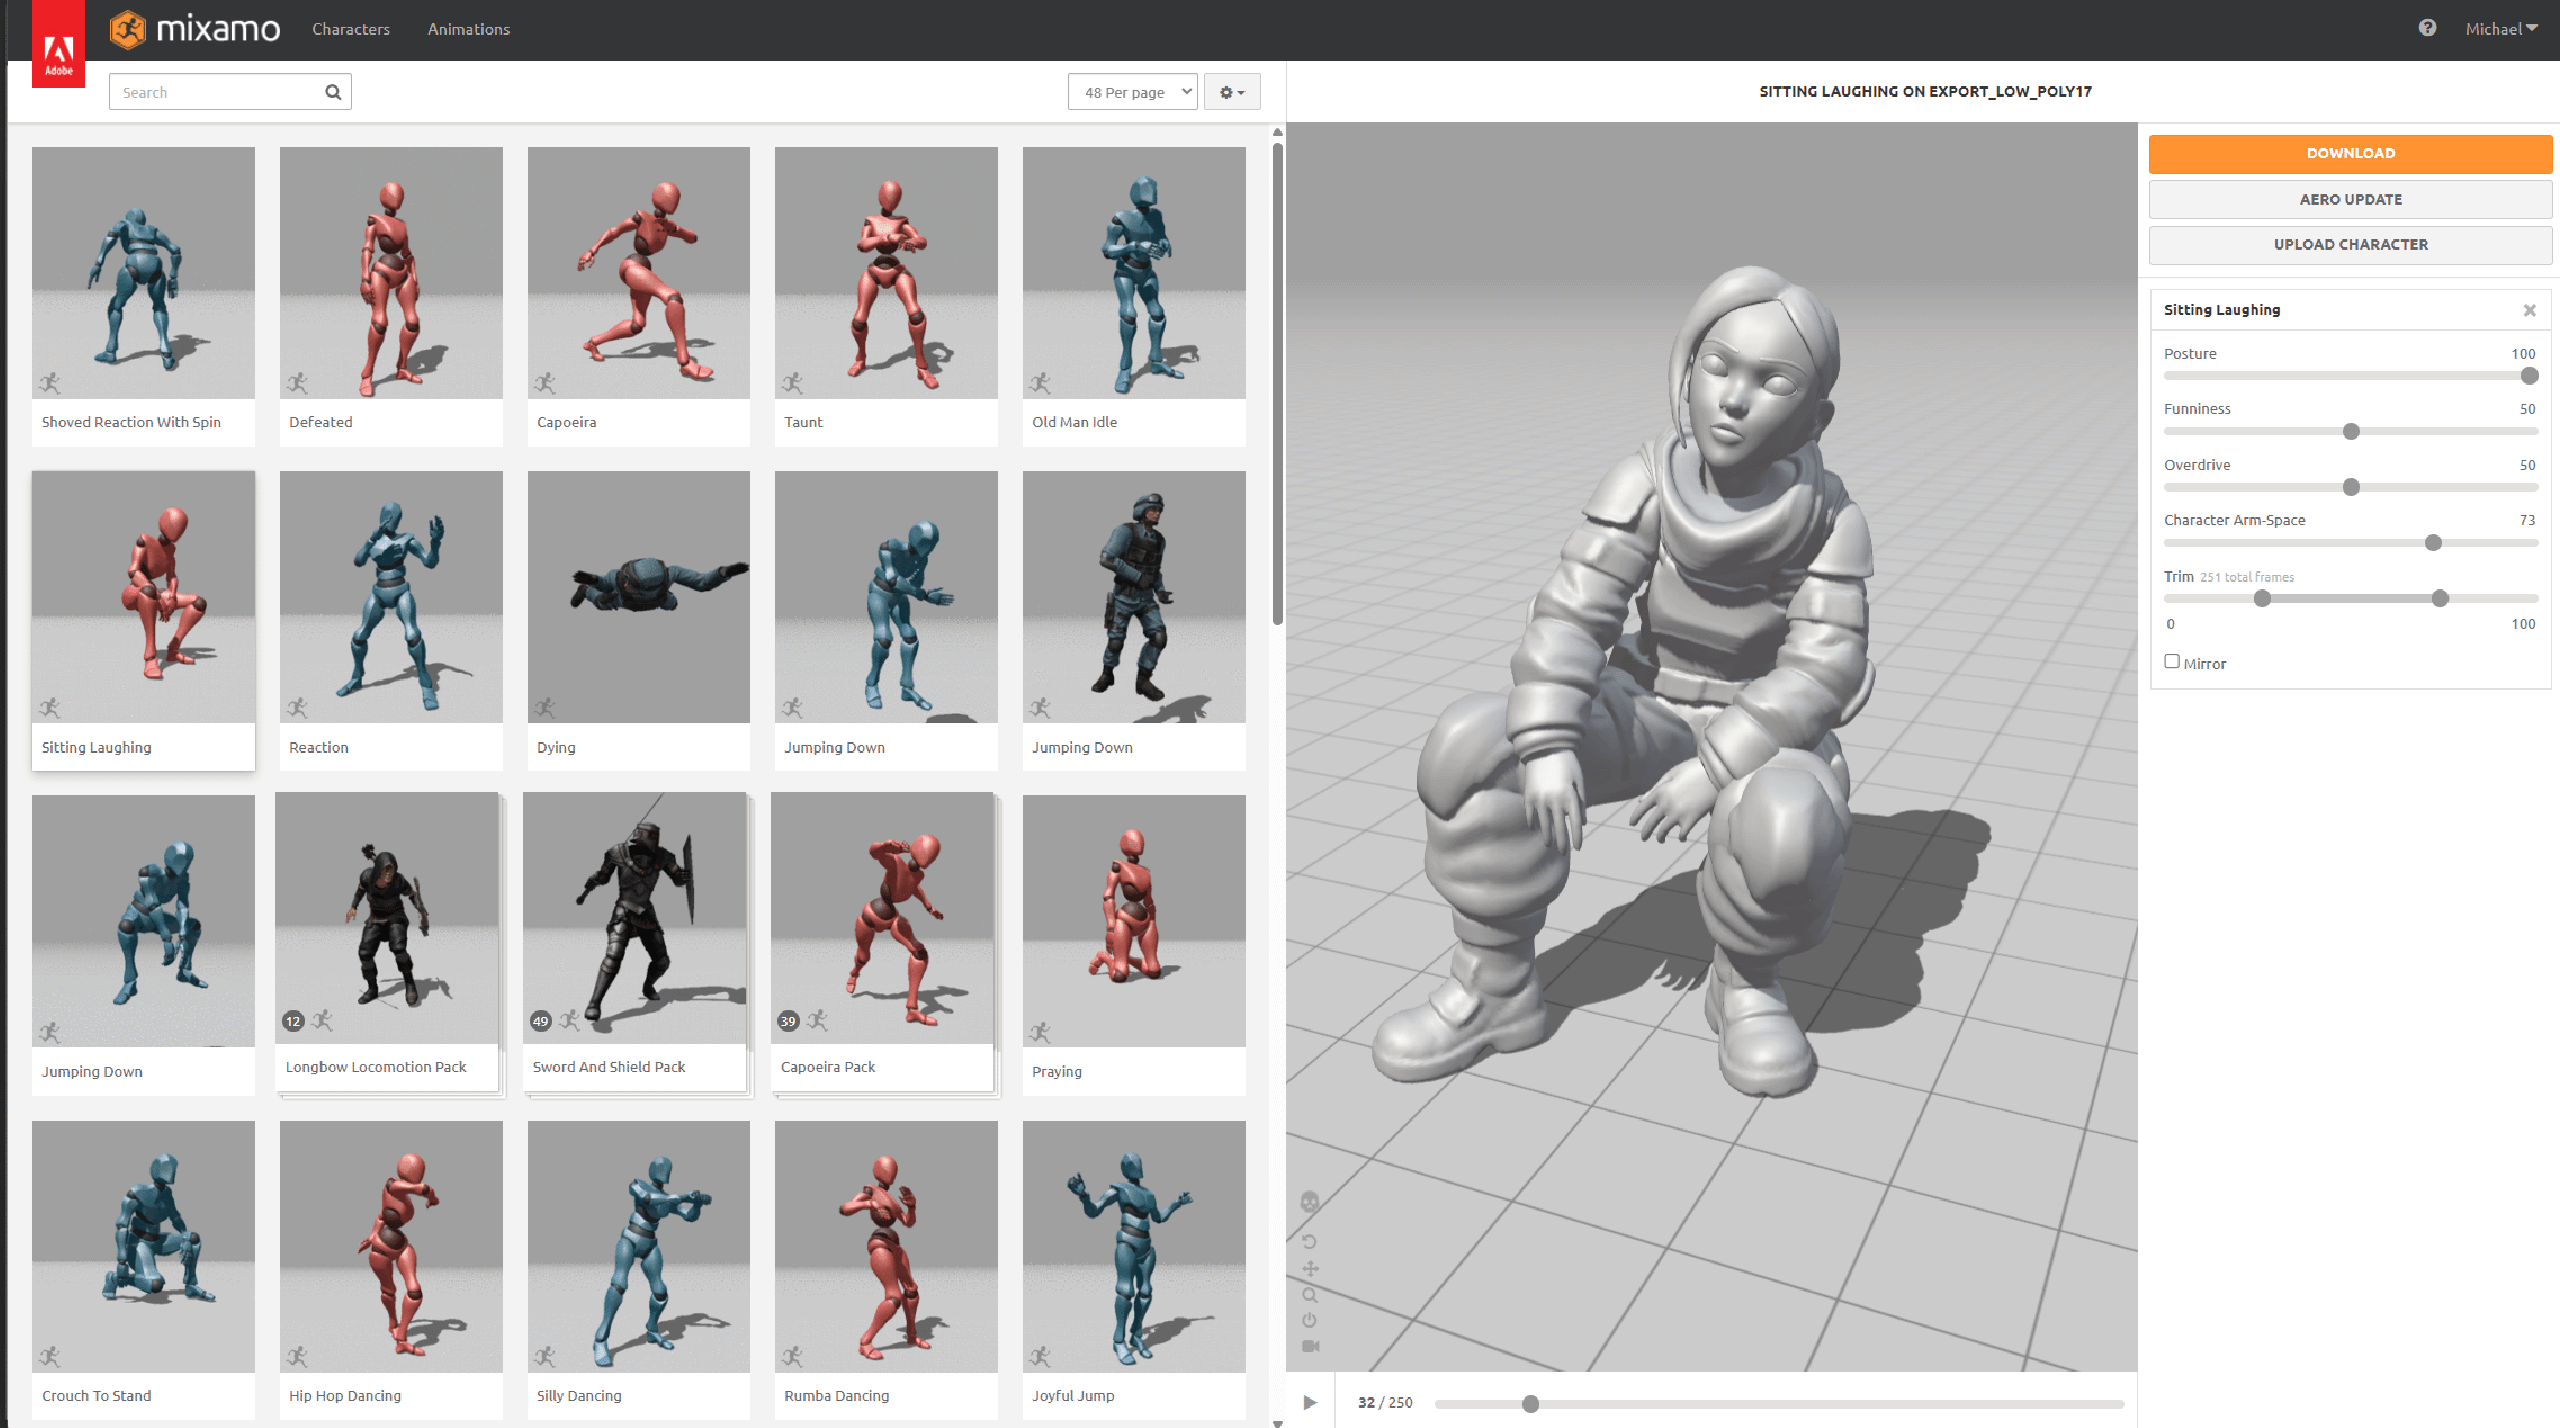
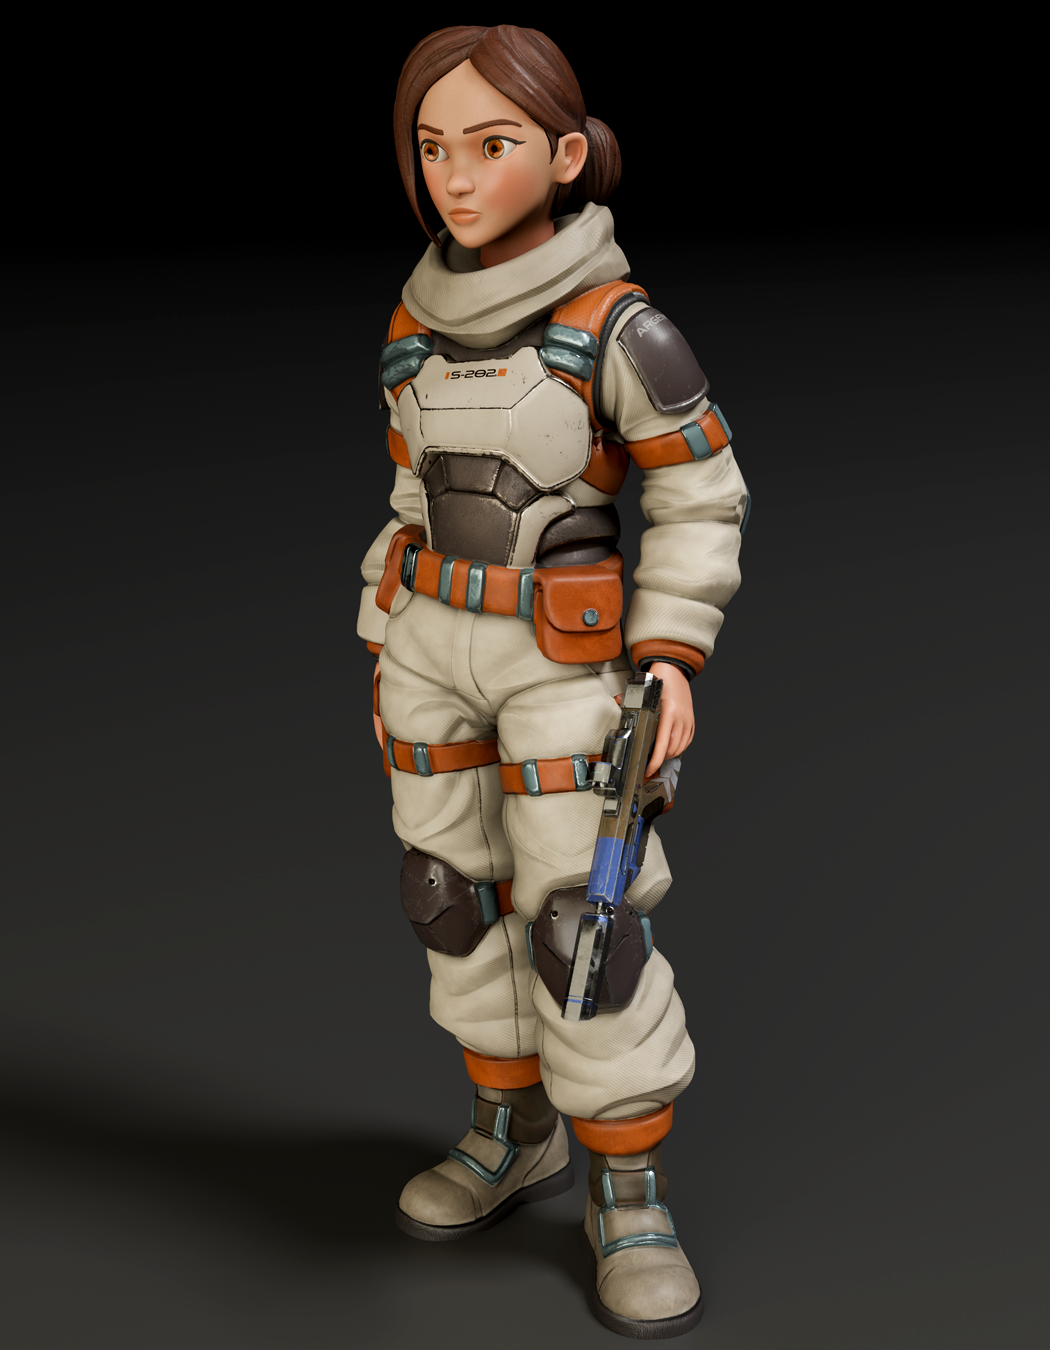
Above, left to right: dabbling in Substance Painter was one of the highlights of my training; I used Mixamo to automate rigging and exporting pre-configured animations. Right: the finished character in a basic rest pose.